

When I first met my partner she showed me some of her snake whips and it’s safe to say I instantly fell in love! they are just so much fun.
The first time I tried to crack her whip…well I hit myself on the shoulder and it was more of a pathetic flop than the enthusiastic Indian Jones style crack, this was the same on the second attempt and every other attempt up until number 3000. But it was still great fun relaxing in the garden with her showing off her skills and me desperately trying (and failing) to look impressive during my turns.
I knew I wanted one!
But as is the case with anything of quality I just couldn’t justify the expense to buy one. Don’t get me wrong they are worth the price with the work that goes into them. They are works of art!
So youtube to the rescue! there are tons of different tutorials online and I highly recommend This tutorial from Nicks Whip Shop.
It may seem long at nearly 2 hours but please don’t let put you off. Most of the techniques are fairly simple and repetitive so it’s really not that complicated. If anything I found the whole process to be very therapeutic and relaxing. These are made from Paracord instead of leather but work just as well!
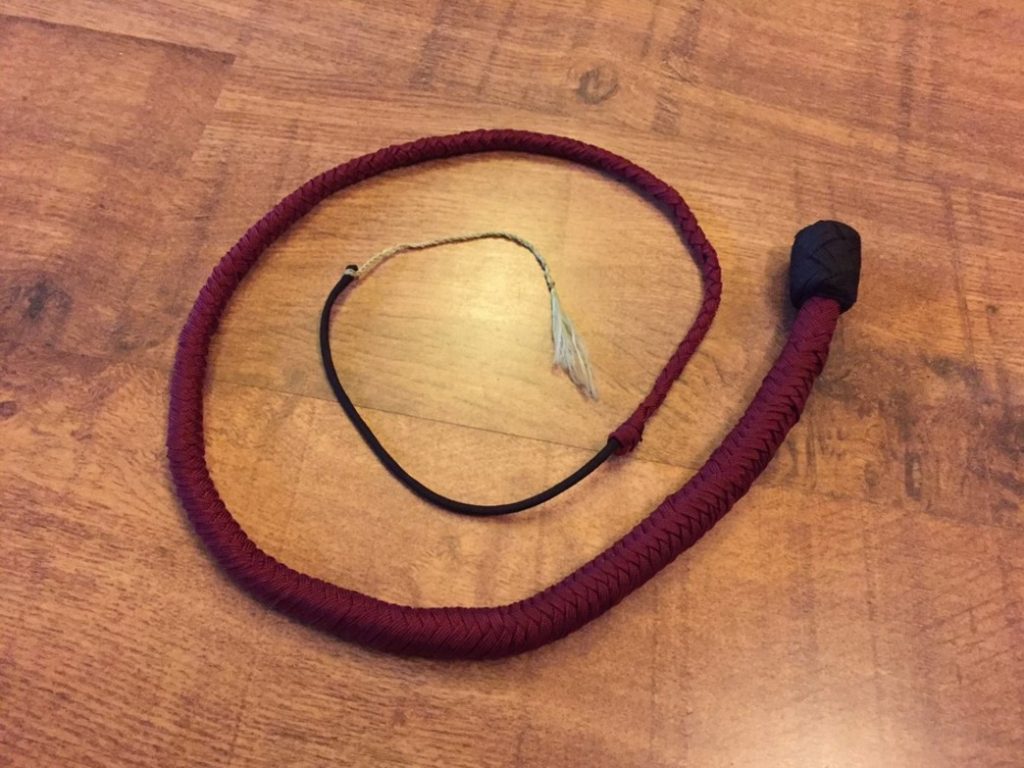
And that was the results of my first whip! as you can see she looks a little grubby, and that is because I was so damned excited I ran straight out to play with her! She is no where near perfect. You can see many, many, mistakes. But she works PERFECTLY! she cracks beautifully! I think in total it took around 8 hours to make, but that time was broken up over a couple of days, plus I buggered up a few times and had to retrace my steps. But she was amazing and well worth the time invested. Once I got into the plaiting groove I found it really relaxing to make to so it wasn’t exactly 8 hours of hard labour 🙂
I ended up making a second whip that was exactly the same as this one. The reason being that wielding one whip looks cool…but using TWO at the same time looks total badass and feels amazing. But unfortunately I never took any pictures of that one

Now this is my favourite whip!!!! it was made as a gift for a friend and came out absolutely stunning! I ended up being gutted I couldn’t keep her for myself! But you can already see the improvements over my first whip to this one (the third whip)
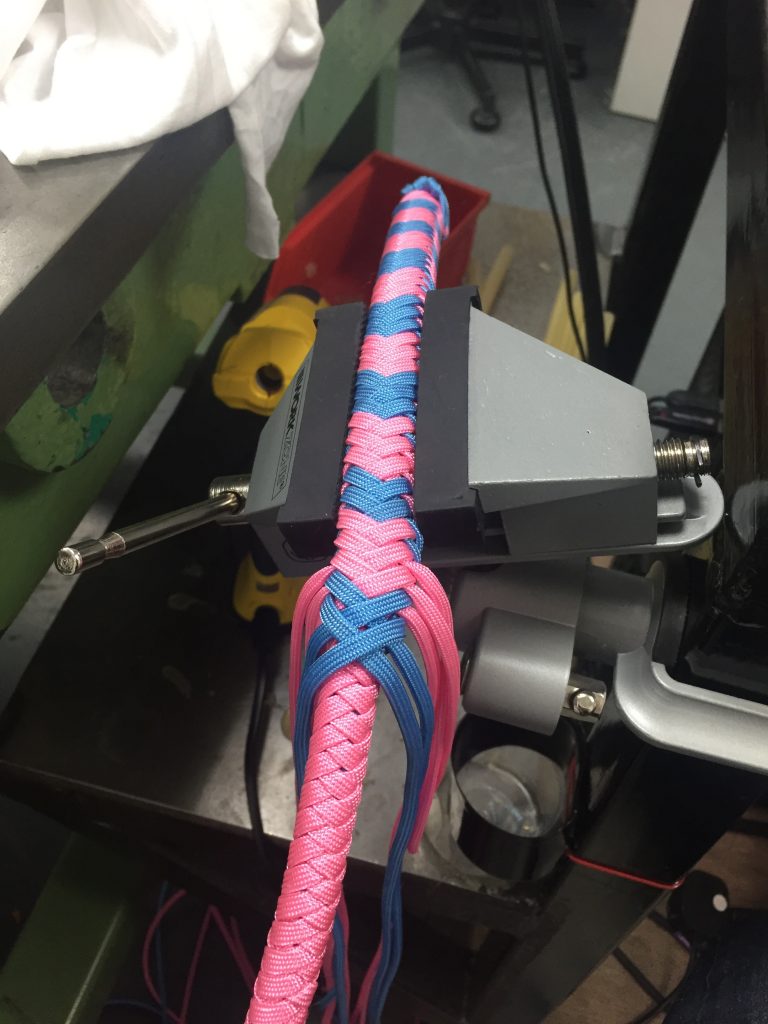
A quick shot of the overlay being plaited
The main improvements to this whip were:
- tighter plaiting
- spending more time rolling every belly
- thinking about how best to hide my strand drops
I did run into a few problems. This was the first time I used different paracord to the original and when doing the core the BB’s just wouldn’t fit into the cord. It was ever so slightly smaller. luckily I had some cord left over from my first two whips so I used that instead for it. It’s just something to bear in mind. I am still struggling with making the drops look neat during the plaiting stage as well. A lot of tutorials I see show this step but don’t go into detail on the best ways to make them look good. But for me that’s fine. I am more than happy with these imperfections as unless inspected they look amazing! and as for those CRACKS!!!! If I get a chance I’ll get a video
So if you want a whip but can’t justify the expense I would definitely recommend making one yourself. In total 1 cost me about £20’s worth of supplies but I had enough of those supplies left over to make a second.
Next on the list is to try and make myself a leather one…